• Skip to main content
  • Skip to main content
Choose which site to search.
University of Arkansas for Medical Sciences Logo University of Arkansas for Medical Sciences
Get Healthy
  • UAMS Health
  • Jobs
  • Giving
  • About Us
    • Contact Us
    • Get Healthy UAMS Newsletter Sign Up
  • COVID-19 Wellness Resources
  • Resources for Diabetes
  • Stocked & Reddie Food Pantry
    • Register for Stocked and Reddie
    • QUARANTINED?
    • Volunteer/Service Hours
    • Donate
    • Contact/Directions
  • Wellness at UAMS
    • Emotional Wellness
    • Environmental Wellness
    • Financial Wellness
    • Intellectual Wellness
      • Mindfulness Sessions
      • Stress Relief
        • Mindfulness References and Resources
    • Occupational Wellness
    • Physical Wellness
      • Breastfeeding Initiatives at UAMS
      • Get Moving
      • Nutrition
      • Quit Smoking with UAMS
    • Social Wellness
    • Spiritual Wellness
    • Wellness Resources Library
  1. University of Arkansas for Medical Sciences
  2. Get Healthy
  3. Author: Kelly Gardner

Kelly Gardner

UAMS Virtual Health Fair

Watch the full recording here!

UAMS Virtual Health Fair 2020

AR-Connect 
Learn about a fantastic new service available to our employees and students who might be struggling with mental illness but unable to find a suitable provider in their community. Listen to learn about its benefits for You!

UAMS Fitness Center and Workout Break with Lindsay

Fitness Center Manager, Adam Carter will talk about Fitness Center services and Lindsay Joyce, our newly minted fitness coordinator, will lead a quick workout break you can do anywhere.

Working Through Stress with Matt Boone, LCSW 

We all carry stress, and during the pandemic, our load has increased. Matt Boone, a licensed social worker, will talk about how to lighten the load.

UAMS Auxiliary

Marcia Dunbar, volunteer coordinator from the UAMS Auxiliary, shares an exciting opportunity for ways you can contribute to their services.

Grocery Haul with Cayla-Marie Jackson, RDN 

Have you ever looked at a package label and felt lost? Registered dietitian Cayla-Marie Jackson will review some typical food products and teach us how to read labels.

Arkansas Employee Assistance Program

Our EAP has some exciting new options for employees at UAMS. Did you know that your UMR insurance covers 10 visits with an EAP professional per year? Listen to learn more!

Human Resource Updates

Join to learn about open enrollment, new convenient drop-off additions and important deadlines that affect your paycheck! DON’T Miss this!

Supportive Conversations

Do you ever just need someone to talk to? Pastoral care has created a new service for employees and students who just need to chat with someone who will understand. Tune in to learn more!

Stocked & Reddie and Cooking Demo 

Join Mande Corbett from UAMS Stocked & Reddie and Margaret Pauly, registered dietitian, as they demonstrate how to make a healthy, hearty meal.

Vision 2029

Tune in to hear a short update on our fantastic accomplishments toward our Vision 2029 goals.

Yoga for Health Care Professionals

Grab a mat or a chair and unwind with Melissa Easdon for some yoga you can do anywhere, wearing any attire. Our last class participants were so relaxed after this session!

M.O.V.E. to Emotional Wellness Tips

Join Tiffany Haynes, Ph.D., and Maria Ruvalcaba for some tips on ways to take care of yourself and your emotional well-being during these trying times.

If you are unable to make it today, the sessions above will be recorded and available on the Get Healthy UAMS website after the event.

Extras!

Online Mindfulness Sessions – The UAMS Mindfulness Program is offering daily mindfulness sessions for employees and students at noon! Tune in for a moment of calm in your busy day.

Pop-up Fitness Classes with Lindsay Joyce – The UAMS Fitness Center will be hosting pop-up Zoom classes during the month of October.

Safe Traveling Tips from UAMS & Arkansas.com – Check out this tip sheet on how to travel safely.

Questions? Email gethealthy@uams.edu

Filed Under: Health Resources

Walk with a Doc October- Dr. Meena and Manasa Veluvolu (M2)

Dr. Meena, a pulmonologist at UAMS, talks with second year Medical Student Manasa Veluvolu about lung health for Healthy Lung Month!

Walk with a Doc October 2020- Dr. Meena and Manasa (M2)

Filed Under: Health Resources

Building a Home Gym: DIY Step-Up Platform

Being stuck at home with little access to fitness equipment may be unavoidable for the time being. However, that does not mean that options are not available. With a few simple tools, minimal cost, and a little time, it is relatively easy to Do-It-Yourself and build some simple but highly effective tools to replace equipment normally found in the gym. Although a few tools are required, being a master carpenter is not.

Step-ups are a versatile exercise that can be performed to both strengthen the lower body and increase cardiovascular endurance. Step-ups can be performed on stairs, however, the steps on stairs typically are not very tall. By building a platform that is taller than the steps on stairs, the exercise can be made more effective. As a bonus, building a platform will likely save some money over buying one. If only the materials, and not tools are being purchased, supplies for this will run around $50. Buying a platform could easily cost three times that amount. For the home-bound handy man or woman, it is entirely possible that all the materials are already lying around. Once all the materials and tools are gathered, total build time is less than an hour.

Before beginning the build, take a tape measure and — standing barefoot on the floor — measure the height from the ground to the bottom of the knee. Since my wife is shorter than me, we measured using her leg to set the final height of the platform. The final height of the platform I built is 15 inches. Your platform height may be different depending on the height of the person or persons using it. Because I was using half-inch plywood for the platform of the stand, I cut the height of the posts supporting the stand to 14.5 inches to achieve the final height of 15 inches.

As a safety note, do not use plywood thinner than half an inch. It may not be strong enough to hold the user’s weight. Half-inch plywood is often used for subflooring in homebuilding and will be more than strong enough to handle being used in this platform. The final size of the platform will be 16 x 24 inches. Many hardware stores sell precut pieces of plywood, so buying a full-size 8’ x 4-foot piece is unnecessary. Just be sure it is at least the size needed for this project. As a minimum, use a 4 x 4-inch post for the support legs to ensure adequate strength. A smaller size of post will not be strong enough or keep the platform evenly balanced when being stepped upon. I used a 4 x 6-inch post to build the legs since I had it left over from another project.

Materials and Tools Needed

Tools
  • One- 8-foot long 4 x 4-inch or bigger post
  • One half-inch thick plywood cut to 16 inches wide x 24 inches long
  • 16 No. 8 wood or deck screws at least 2 inches long
  • A circular saw or miter saw
  • Drill
  • Eighth-inch drill bit
  • Phillips head drill bit
  • Tape measure
  • Level
  • Hand saw (optional, may be needed to cut posts if a circular saw is not big enough, not necessary if using a miter saw)
  • Power sander (optional)

Step 1: Measure the leg length and wood for making the cuts. Use the circular saw or miter saw for these cuts. The miter saw will make cutting the post easier, but if you do not have access to one, a circular saw may be used. If using a circular saw, keep a wood saw handy for the posts. My circular saw was not quite big enough to cut through the 4 x 6-inch post. It may not have been an issue on a 4 x 4-inch post. Cut the posts to a half-inch shorter than the measured height at the bottom of the knee as described earlier. This will ensure proper height of the finished product. To build a 15-inch high platform, I cut the posts to 14.5 inches in height. Cut the plywood to the 16 x 24-inch platform size. If buying the wood for this project, some hardware stores may cut it for you if asked. Just be sure to measure twice and cut once.

Sawing

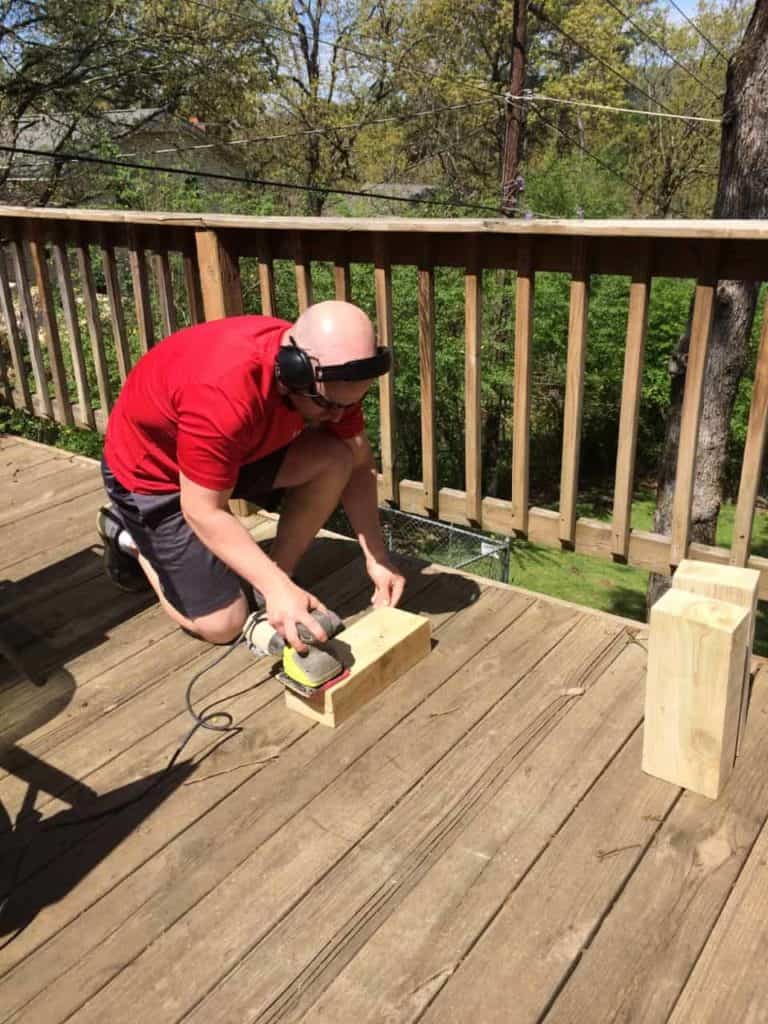
Step 1.5: Sand the cut pieces to reduce splinters along the cut edges. This isn’t necessary but does make the final platform look better.

Sanding

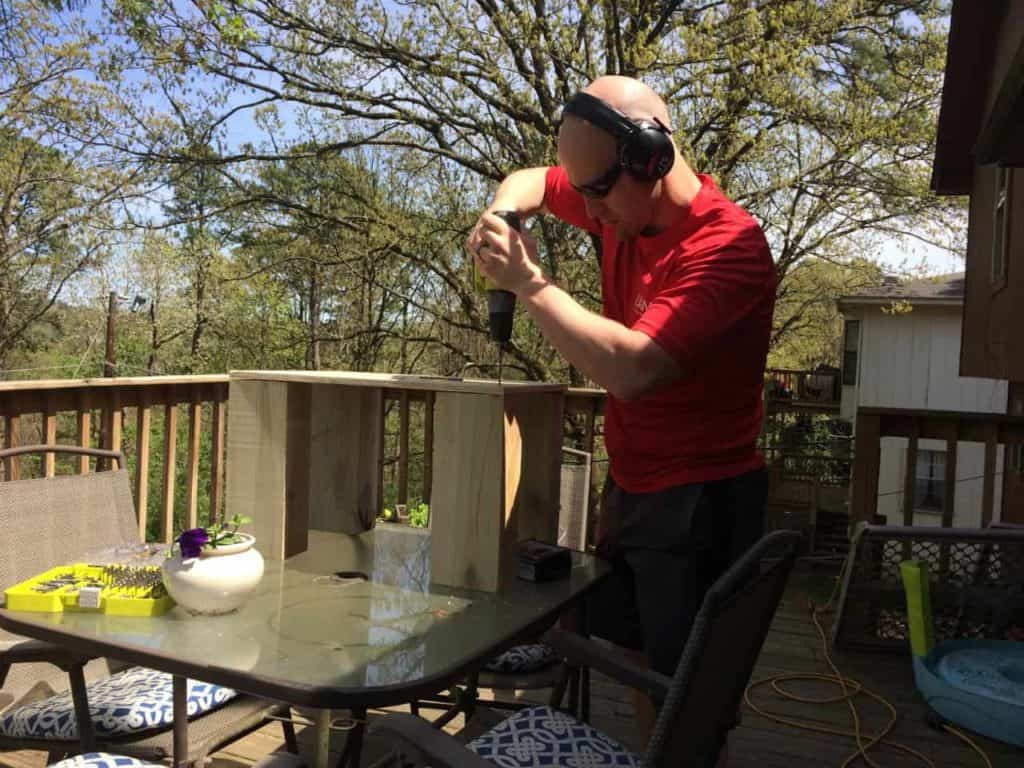
Step 2: Set up the cut posts and platform piece on a level surface with the platform on top of the posts. Use the level to check to ensure the cuts were made correctly. Once the platform is level, use the eighth-inch drill bit to drill four pilot holes in each corner of the platform and down into the posts. Make sure the edges of the platform are flush with the posts in the corners. Drill the first two holes a half inch from the edge of the platform. Drill the third and fourth holes 1.5 inches in toward the middle of the platform from the two holes along the edges. The bottom screws should be in line 2 inches below the top screws. Repeat this process for all four corners of the platform.

Drilling

Step 3: Once all four posts are attached following the procedure in step two, double check that the platform is level.

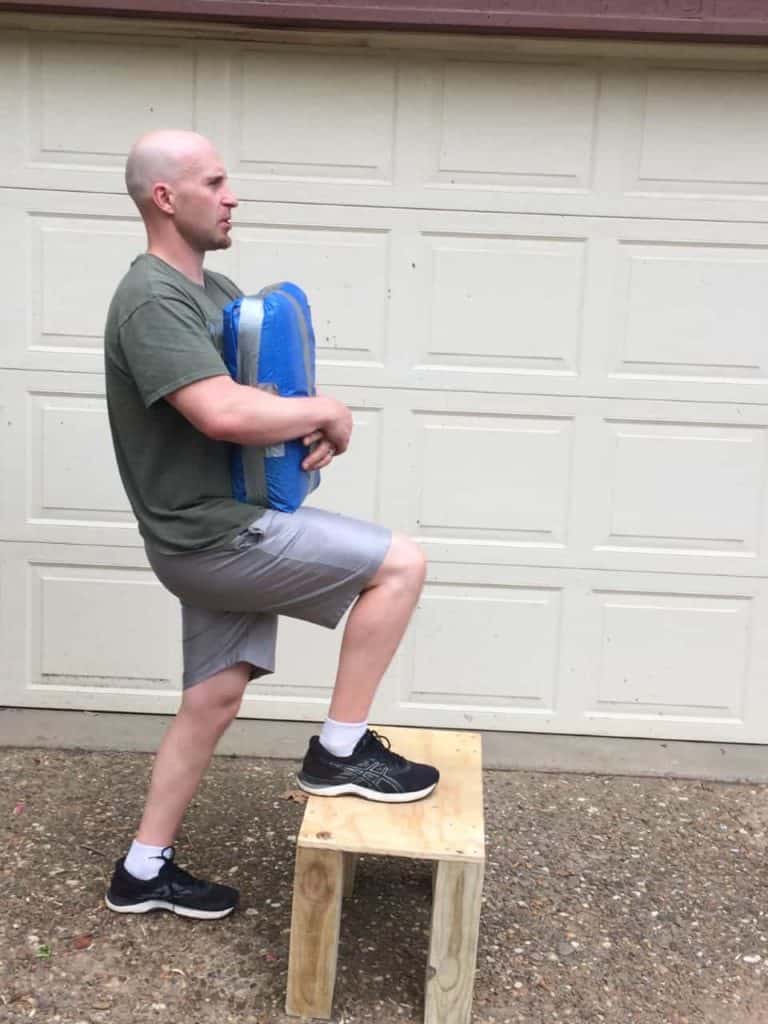
Step 4: Test and workout! In the pictures below, I am holding a 60-lb sandbag. If built correctly, this platform will safely support up to 250 lbs. It may well support heavier loads, but I have not yet tested that.

The step up is an excellent lower body strength-training exercise when adding resistance as pictured. It can also be an excellent cardiovascular exercise when done without weight. Using considerably less space than any piece of cardio equipment, a step-up platform is the space-saving, home version of the stair climber in the gym. Step up to health.

Filed Under: Get Healthy Videos

Hike to Health: Part Three: Pack Selection

For the general fitness enthusiast or the recreational afternoon hiker who is looking to move into all-day or multiple-day hikes, a quality pack is necessary once quality footwear has been addressed. The quality of the pack needed is determined by the load to be carried as well as the length of the hike. When considering a pack to purchase, there several design factors that need to be considered: size of the pack, style of the frame, quality of the material used, and features that make wearing the pack as comfortable as possible. Once these issues have been addressed, fitting the pack correctly for wearing is relatively easy.

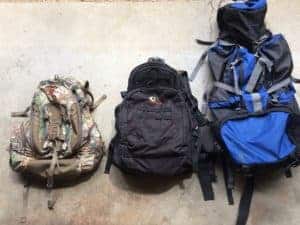
Left to Right: 1850cc, 3500cc and 6000cc packs

Understanding pack size is the most important aspect of picking a pack. The size of the pack will determine how long a hike can last. Packs are typically measured in cubic centimeters (CCs) or liters. When discussing the size of the pack, we are looking at the overall storage area of the pack, typically referred to as the bag. This does not include the size of the frame. As a rule, packs that are 2000cc or smaller are considered day packs. Depending on the quality of a pack, packs this small may or may not have a frame, which helps support heavier loads. Packs this size are comparable to what a middle school-aged child would wear to school. Packs that range in size from 2000-4500cc are typically considered capable of long weekend use. These packs will typically hold enough food, clothing and shelter for 3-4 days of use. An experienced hiker could probably stretch that to almost a week, but that is after taking several multiple day-hiking trips. Almost all packs manufactured in this size range have a frame. A pack bigger than 4500cc is for hiking a week or more. Only those who wish to spend copious amounts of vacation days doing long hikes, like the West Coast or Appalachian Trails, need to consider packs this size.

When it comes to supporting the load a pack can carry, a frame is necessary for anything heavier than around 20 lbs. There are two styles of frames: external frames and internal frames. External frames are visible on the exterior of the bag part of the pack. Internal frames are hidden from view by being built into the bag portion of the pack. Both frame types are typically made from lightweight metal such as aluminum. Really high-end packs sometimes have frames made from higher quality materials such as titanium or carbon fiber. However, for the average person, the price point on these packs is so high that the improvement in quality is not worth the extra money. Using these materials makes the frame lighter without sacrificing durability or comfort. When doing multiple day hikes, ounces saved add up to pounds saved. Saving weight in pack design leads to less physical stress on the body from carrying the pack load. This allows for better duration when hiking miles and a more enjoyable experience.

While the material of the frame is not as great of concern for most people, the material of the bag should be. Cheap packs are made of materials that are often lightweight but have very little durability and will rip easily. Packs made from cotton or fleece can be durable. However, these materials are not waterproof. While a decent daypack could be made from these materials and used when it is not raining, it would be a mistake to buy a multi-day pack made from material that is not waterproof. Nothing ruins a multiday hike like having everything soaking wet. Quality packs are often made from Cordura nylon or heavy polyester fabrics. This lends a waterproofing to durable materials. These types of fabrics are also stronger than cotton or fleece, capable of handling more weight in a smaller pack size than cotton or fleece-based materials. In addition to the size, frame style and material there are several additional features to consider when choosing a pack. Keep in mind that the more features a pack has, the higher the price point will likely be.

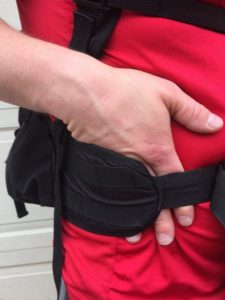
Any pack that is going to be considered for more than an afternoon hike should have three nonnegotiable features: a waist belt, adjustable shoulder straps and an adjustable chest strap. When carrying heavy loads in a pack, it is best to settle the weight of a pack low on the hips rather than high on the shoulders. This is impossible without an adjustable waist belt. Packs that only have shoulder straps will put all the pressure of the weight of the pack on the upper back and shoulders, making for an extremely uncomfortable carrying position and greater fatigue when hiking longer than an hour or two. When fitting a pack, always adjust the waist belt first to support most of the weight on the hips. The belt should be snug enough that the pack does not bounce up and down while walking but not so tight that it is uncomfortable on the stomach. Leaving enough room to slip two fingers between the belt and stomach is generally a good fit. Once this is

done, adjust the shoulder straps so that the pack feels snug against the shoulder and is not leaning back to create an uncomfortable backward pull on the shoulders or gap between the pack and the upper back The strap crossing the chest should be the last strap adjusted. The purpose of this strap is to keep the weight balanced across the back so that it does not slide too far to either side of the body. Follow the same adjustment procedure for the shoulder and chest straps as described for the belt.

Proper fitting of a pack belt. Anything tighter will be uncomfortable, while anything looser will not provide proper support to carrying the load.

For packs designed for multiple-day hikes, a couple of other features are nice to have but not required. A storage compartment for a water bladder with a hose makes carrying water and staying hydrated easier and more convenient than carrying multiple water bottles. Small pockets on the waistbelt and shoulder straps make carrying small items such as snacks or a GPS unit readily accessible.

From day packs to multi-day packs, there are a plethora of options available. Most often, people who try hiking with packs and do not enjoy it struggle because they did not take the time to learn how to fit the pack correctly to reduce wear and tear on the body while hiking. Once a person has decided on what type of pack will best meet his or her needs, success lies in learning to wear it correctly. Put in the effort and the scenery will beat any day on the treadmill.

Some loads are more fun than others.

Filed Under: Health Resources

Building a Home Gym: Sandbag Weights

By: Adam Carter, M.Ed., Manager of the UAMS Fitness Center

Strength training options can be limited without access to the gym. Buying weights for the home is expensive and inconvenient if it takes up a lot of space in the home. Without weights, body weight training is about the only option — or is it? Body weight strength training is a great option when access to equipment is limited. But it does not have to be the only option. With minimal cost and equipment, durable sandbag weights can be created for use at home.

It is possible that you may already have all the needed equipment at home. If the materials need to be bought, each sandbag weight can be built for around $20 per bag and can be purchased at most big brand box stores and hardware stores. Since I already had duct tape, trash bags, and an old tarp, all I needed to purchase was a bag of concrete mix. Total cost with sales tax: $4.34. Sandbags manufactured as fitness equipment are typically sold at a price point of $1.50-2.00 per pound. A 20lb weight would cost around $35-40. The 60lb bag used in this example could cost as much as $120.

All that is required is a bag of sand or dry concrete mix, a few trash bags, a small tarp or a cutdown piece of a tarp, and duct tape. I have dumbbells up to 50lbs at home, so I purchased a 60lb bag of dry concrete mix for this. Most stores will carry bags of sand or concrete varying from 20lbs up to 80lbs. Both lighter and heavier options are available depending on individual strength levels and needs. Once the materials are assembled, build time on this is less than 10 minutes.

tarp

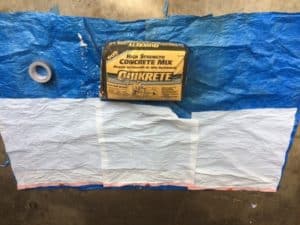
Step 1: If using a contractor-strength trash bag, probably only one bag will be needed. If using regular kitchen trash bags, as pictured, using a few bags is a good idea. The trash bags are to prevent the sand or concrete mix from spilling if the original packaging should tear or get a hole in it. Wrap the sandbag inside the trash bags and compress the bags to remove access air. Once this is done, wrap the trash bags in duct tape along the edges and the opening of the bag to seal it shut. With this done, move the sandbag off to one side of the tarp with enough space to wrap the near end of the tarp over the top of the sandbag.

Sand bag and tarp

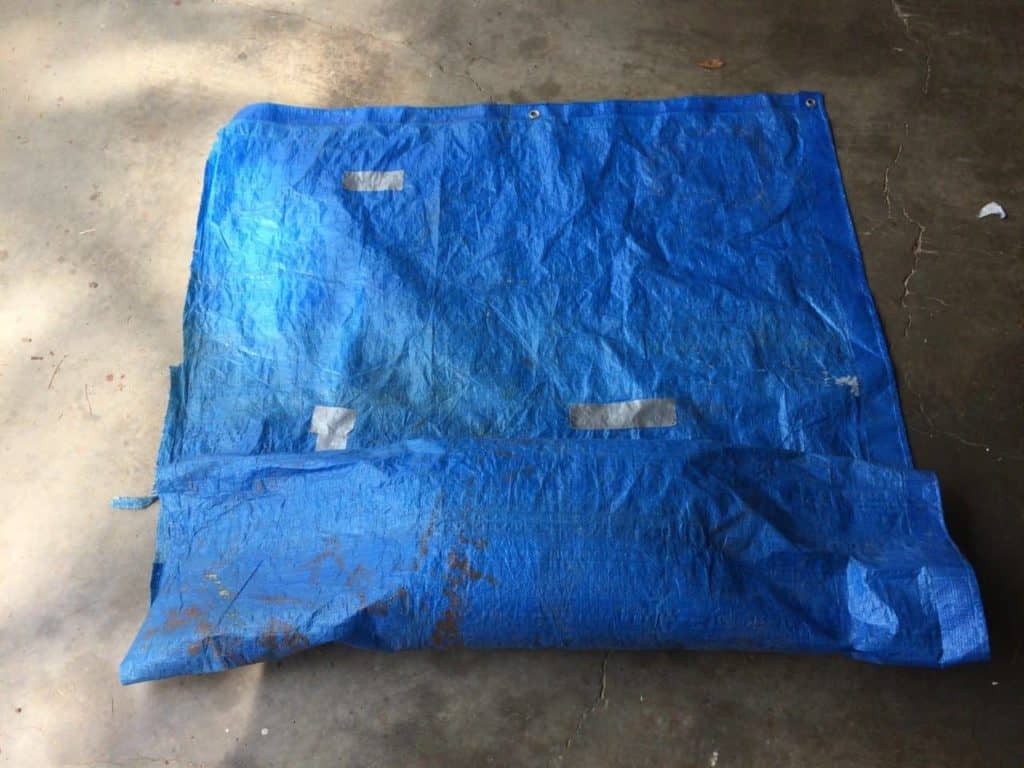
Step 2: Roll the near end of the tarp over the top of the sandbag and continue rolling the sandbag across the tarp until it looks like a burrito. Yes, you read that correctly, a burrito reference in a fitness article. If you are reading this on Taco Tuesday, you are welcome.

homemade sandbag tarp
Rolled up tarp sandbag

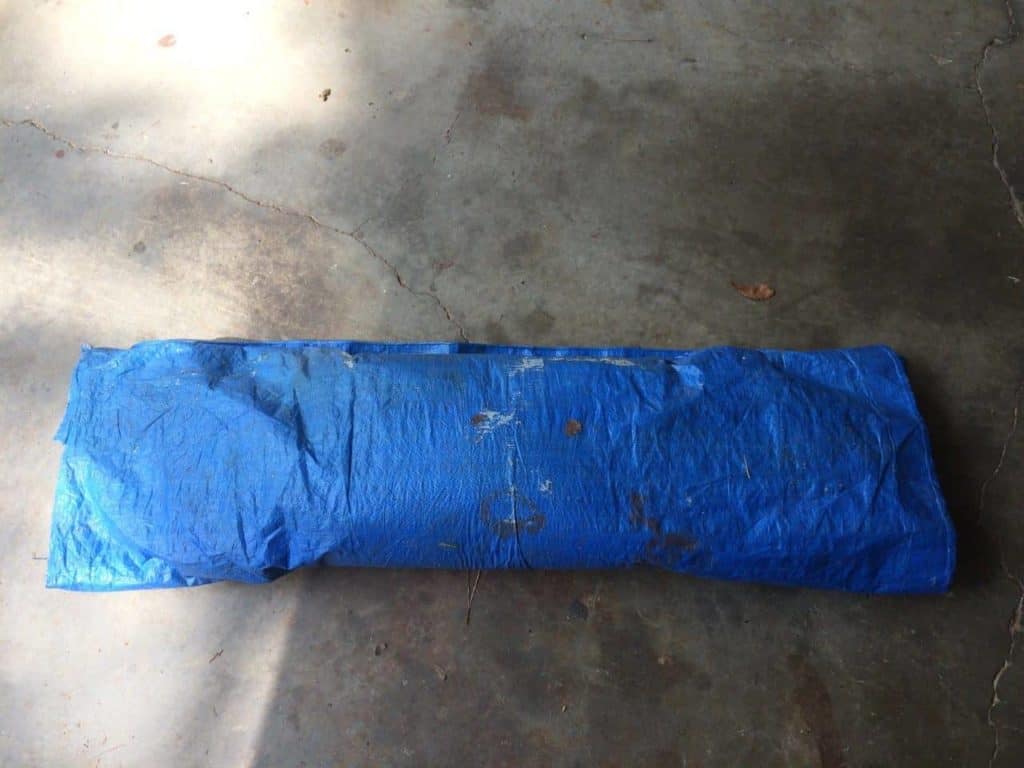
Step 3: Fold in the ends of the tarp, like folding up a burrito. Compress the air out of the tarp so that it lies flat around the sandbag and duct tape the ends and around the ends to seal it up. Once this step done, the sandbag is complete and ready to be used as a new workout tool.

finished sandbag

Sandbags offer a lot of versatility as a training implement. Almost anything that can be done with a kettle bell or dumb bell can be done with a sandbag. Another great bonus of using a sandbag for strength training is its shape. Because it is bigger and more malleable than a barbell, kettlebell, or dumbbell, holding a sandbag challenges and develops grip strength far more than most strength training implements found in the gym.

Filed Under: Health Resources

Tonya Johnson and Healthy Food Options on campus

March is National Nutrition Month. Each year the Academy of Nutrition and Dietetics develops a campaign to promote better eating. This year the theme is “Bite by Bite.” We can make a change in our eating behaviors with each bite we take. We can choose healthful food items from each food group, choose healthful recipes, hydrate healthfully, practice portion control, take time to enjoy our food and enjoy healthful eating at school and work. UAMS Nutrition Services wants to make it easy for every student, employee, patient and visitor to have healthy options available.

Tonya Johnson

We offer healthful options at each of our retail locations. You can find salads, fruit, low-fat dairy and lean protein sources across campus. We offer whole grain breads, plant-based entrees such as black bean burgers, portabella sandwiches, tempeh and a variety of vegetarian choices, and nitrate-free meats. The cafeteria has a heart-healthy plate and a 500-calorie plate daily. The cauliflower crust pizzas are delicious and full of plant power. Even our snacks have gotten healthy! Look for hummus and avocado toast in our grab-and-go coolers. We carry a line of Beanfield bean chips, Smart Popcorn, Off the Eaten Path, Kind Bars, Simply Chips and other healthy snacks. Doc Java now offers fresh fruit smoothies too!

Whether you are hungry for a meal or a snack, we have the healthy options you are looking for.

Filed Under: Health Resources

Walk with a Doc – Dr. Mendiratta

Walk with a Doc – Dr. Mendiratta

Filed Under: Health Resources

University of Arkansas for Medical Sciences LogoUniversity of Arkansas for Medical SciencesUniversity of Arkansas for Medical Sciences
Mailing Address: 4301 West Markham Street, Little Rock, AR 72205
Phone: (501) 686-7000
  • Facebook
  • Twitter
  • Instagram
  • YouTube
  • LinkedIn
  • Pinterest
  • Disclaimer
  • Terms of Use
  • Privacy

© 2021 University of Arkansas for Medical Sciences